![]()
Body / Frame
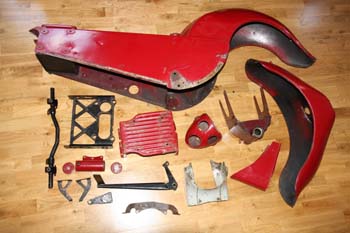
There are plenty of cosmetic problems with this bike. It has had a very poor paint job at some time, full of runs and completely covered in tiny blisters (water droplets in the air?). There are also plenty of small dents and bends and it generally need a good sorting out. The first job was to strip it down and prepare the following parts for shot-blasting:
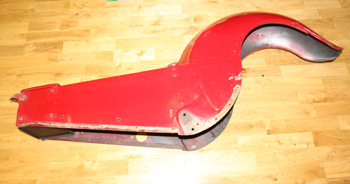
Main body with chrome stiffeners, etc removed |
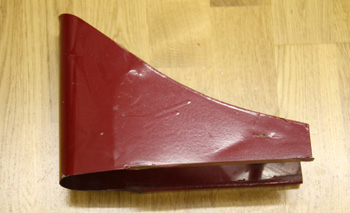
Front mudguard |
|---|---|
Rear number plate bracket |
Carrier |
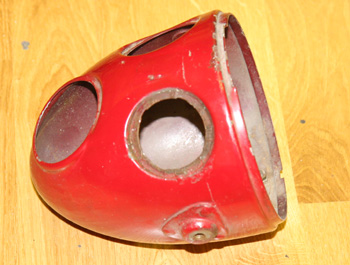
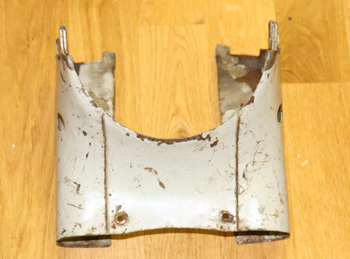
Headlamp shell |
Headlamp bracket |
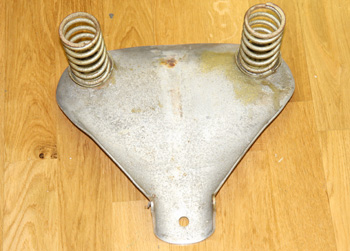
Seat with springs |
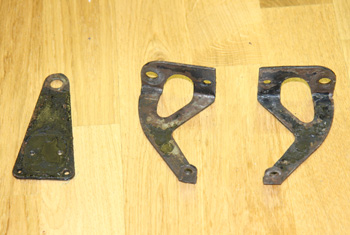
Stop light switch bracket, L & R footboard brackets |
Front engine bracket |
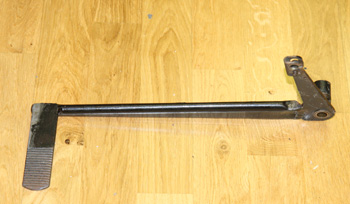
Back brake pedal |
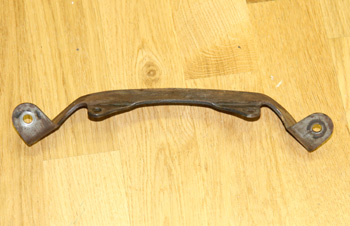
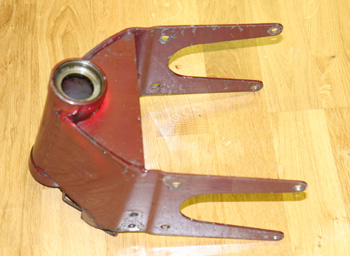
Rear engine mount/cross member |
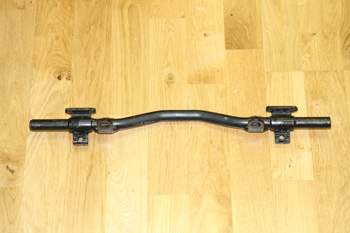
Front cross-tube |
Steering head |
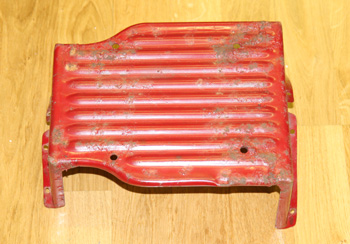
Toolbox lid |
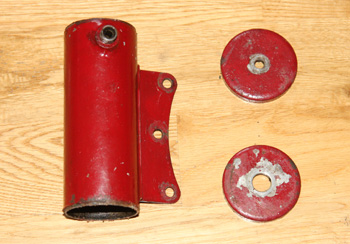
Oil filter tube and end caps |
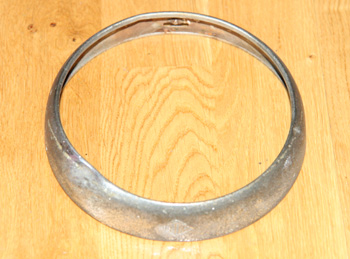
Headlamp rim |
Note:
This lot went off to the shot-blaster on 3rd March, I should have them back in about 3 weeks.
Paint colour chosen: Volvo 117-1 moerkroed (1976), paint card 1.17. This colour is just a fraction brighter than the original.
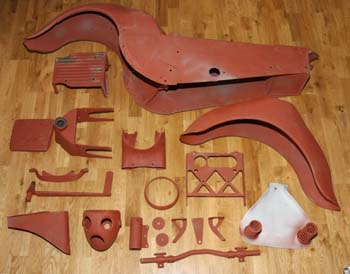
9th April, collected the parts after shot-blasting:
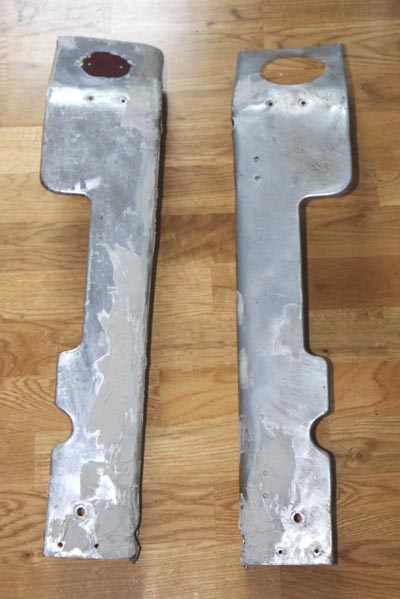
Body parts before shot blasting.... |
....and after |
|---|---|
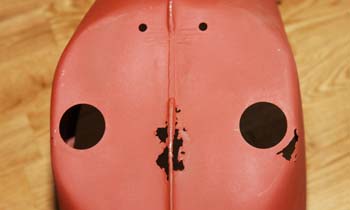
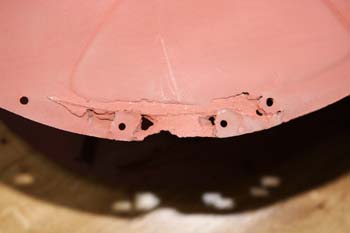
Holes in front mudguard |
Dodgy bits around the body edges |
I am pleased with the results of the shot-blasting, but it has revealed a lot of problems to be overcome. This is going to take longer than I originally thought! The shot-blaster had exposed some areas of filler and had avoided blasting too much away, in case of losing hole positions, etc. I think this was the right approach, but it did create extra work for me.
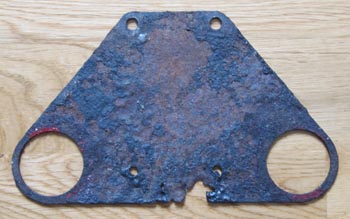
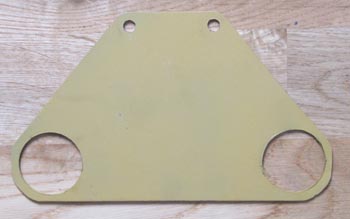
The front mudguard has a reinforcing plate under the flat part at the top. This is a water-trap and accounts for the rust problem. On re-assembly I must make sure I seal this gap against water getting in again. Here are the remains of the plate and the new one I made:
Front mudguard reinforcing plate |
New plate in primer |
|---|
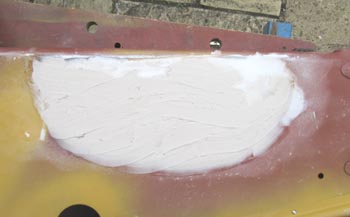
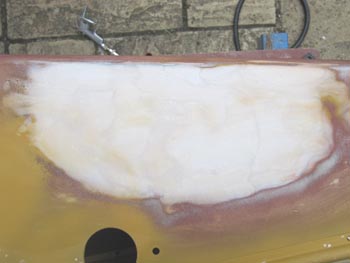
The "mutton chop" stiffeners and the chrome trim from the edge of the body are perfectly sound, though the chrome is in poor condition. After some thought, I decided to paint these, as was done anyway on later models of the Mk III. I have spent a lot of time working on the body, largely straightening, filling, rubbing down and re-priming. A few photos:
Filling a large dent.... |
....and after rubbing down |
|---|---|
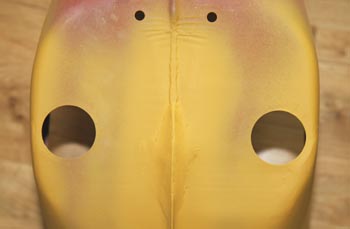
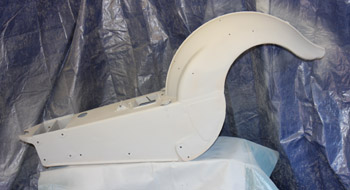
Front mudguard top after repairs |
Body side after straightening & filling |
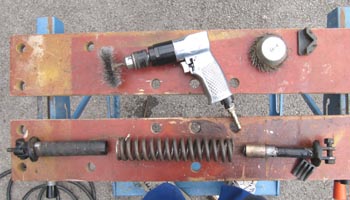
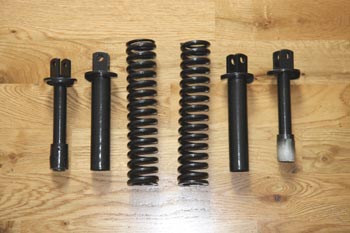
Front forks preparation |
Front forks components in primer |
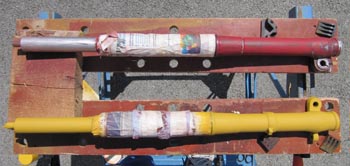
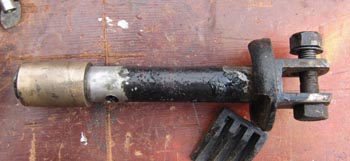
Rear suspension unit before |
Rear suspension tube before |
Rear suspension slider before |
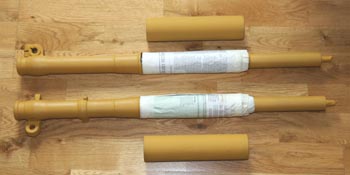
Rear suspension preparation |
Rear suspension parts after painting |
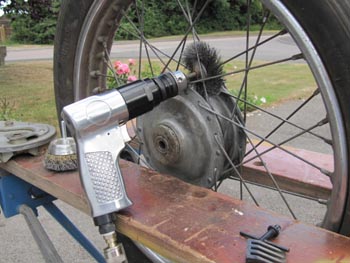
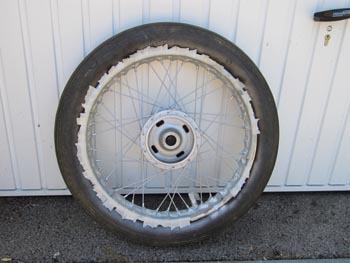
Front wheel preparation (!) |
Front wheel masked for painting |
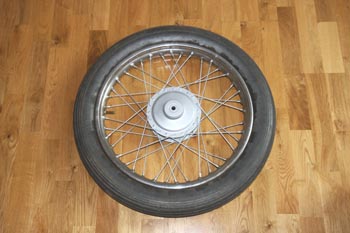
Front wheel painted.
|
All this is coming on quite well, though it's not quick! The next job is to prime and flat all these body parts ready for painting.
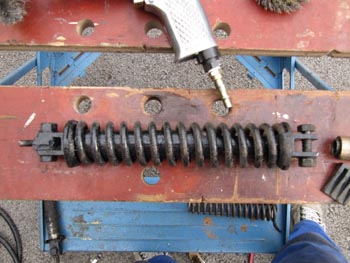
The wheels (see above) are in fair condition and I don't intend to spend money on having them rebuilt at this stage. I spent a couple of hours wire brushing the spokes and brake drums. As you can see from the picture, I found I could just manage to get a small rotary wire brush through the gap between the spokes (with a bit of a struggle!) and from there it would reach the brake drum and the back side of the spokes. This was certainly a tedious business, but it didn't take that long and I got everything nice and clean ready for painting. Masking the rims was another tedious business - what a performance!
Once clean, I've painted those parts with silver Hammerite and the result looks pretty good. I have a small worry that heat from the brakes may cause the paint to discolour, but let's get the thing moving first!
A few months ago I picked up a small (2 inch) air sander at an auto-jumble and this has proved invaluable for rubbing down, etc. It is just the right size for these motorcycle parts:
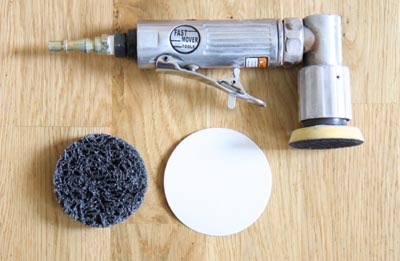
I have pictured two different discs here, the left hand one also came from the auto-jumble, it is a bit ferocious but it certainly gets rid of old paint quickly! The other is a 3 inch 180 grit disc from a local paint shop. I find this type of disc excellent because being a bit too big, it overlaps the edge of the backing disc and gives you a "soft" edge.
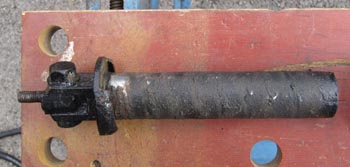
My next task was one I've been putting off but there is really no escaping it now. There are quite a number of small parts which will need to be tidied up in one way or another, the top yoke being a good example:
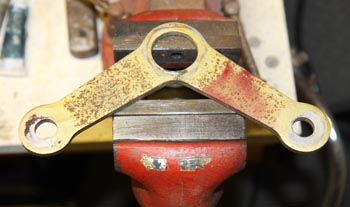
Some of these parts were originally chromed and in many cases replacements are available in stainless steel. No doubt this would greatly improve the appearance, however I need to keep the cost under control! I decided to strip these parts with the wire brush and give them a good coat of silver Hammerite. Time will tell if this is a good idea, but these parts can always be replaced or re-chromed later on if necessary.
 |
 |
|---|---|
 |
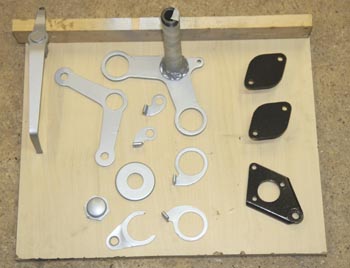
The photo shows some of the parts I treated today - I still have to paint the other side of these!
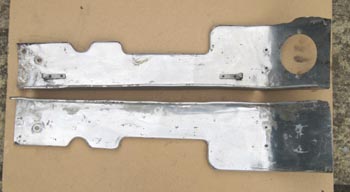
I also stripped the legshields using paint stripper - a pretty awful job! Although they do look better than I expected, they will need to be painted and I will need to decide what colour to paint them. Hmm. I also removed the licence holder from the left hand legshield and this has revealed the original paint. I'm tempted to leave that there under the licence holder for posterity.
PRIMER
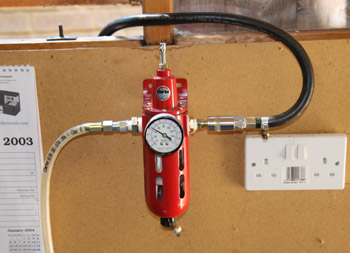
Well we finally had a warm dry day and I made a start on the task of getting a couple of coats of primer onto all the body parts I've been working on over the past few months (it feels like years!). The idea was to clear out my shed, which is just used to store junk these days, sheet all the shelves and use it as a spray booth. This scheme worked quite well. I fixed the filter/regulator to the wall and ran a long air hose out from the garage, where the compressor is. The idea was to have the compressor indoors where the humidity is hopefully a bit lower. After a few experiments, the spray gun seemed to work best at around 40 psi, so that's where I set the regulator.
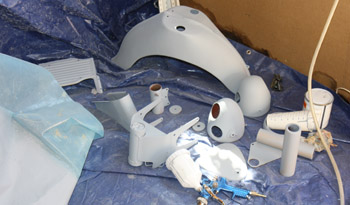
Filter/regulator fixed to the shed wall with air hose coming in from the garage and a short hose for the spray gun. |
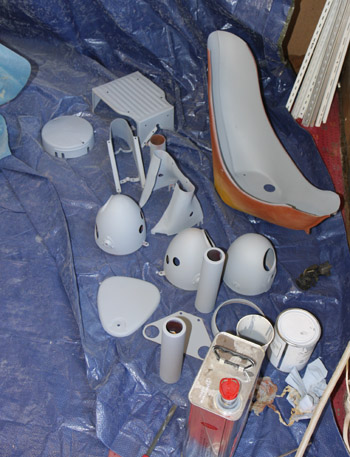
Collection of smaller parts after a coat of primer |
|---|---|
Body after a coat of primer |
More parts after priming |
The spray gun is a High Volume / Low Pressure (HVLP) type, which seems to be the favourite these days. This seems to use a surprising amount of air and you really do need a 3hp compressor, with a tank volume of at least 50 litres, even for spraying these comparatively small parts.
The Grey high-build primer is very thick when you open the tin and it has to be thinned 1:1 with cellulose thinners. It needs thorough stirring. The spray gun incorporates a fine mesh filter and this is essential. Everything now has two coats of primer and the next job is rubbing down with wet & dry. I'm planning on another 2 coats of primer before the colour goes on. I also applied a coat of anti-stone chip paint to the underside of the mudguards and body. Hopefully this will help keep rust away. Certainly it has resulted in a good thick coat on the underside.
By the way, the sharp-eyed will have noticed two headlamp shells. My friend up the road is also restoring a bike, a James Cadet, more or less simultaneously and we shared the cost of a tin of primer! Some of this was easier with two pairs of hands as well!
LEG SHIELDS
The legshields are in a pretty tatty state, lots of small dents, a couple of cracks and a bit worn away at the bottom of each. I decided to use Durafix to "solder" in small patches of aluminium and then tidy it all up with filler.
Durafix is funny stuff! You clean the area to be soldered with a sharp stainless steel wire brush, heat the metal with a blow torch and melt the Durafix rod just like a rod of solder. It bonds very well to the aluminium and is quite a useful option. The original metal of the leg shields tends to melt away, so my advice here is to work quickly and resist the temptation to go over it again to get a better finish - if it's stuck, then call it done and sort out any defects with angle grinder and eventually filler. With the leg shield bottoms reinforced with aluminium and lots of filler everywhere, the result looked like this:
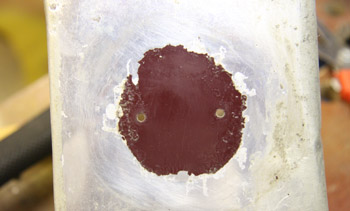
TOOLBOX LID
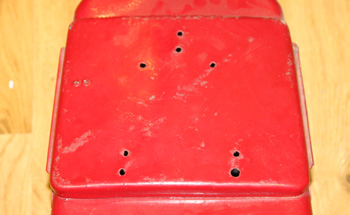
The toolbox lid is mot a thing of beauty! It has a lot of "extra" holes in it, probably something to do with its former career with the Lancs police. Probably the mountings for a radio handset. After cleaning and priming it looks like this:
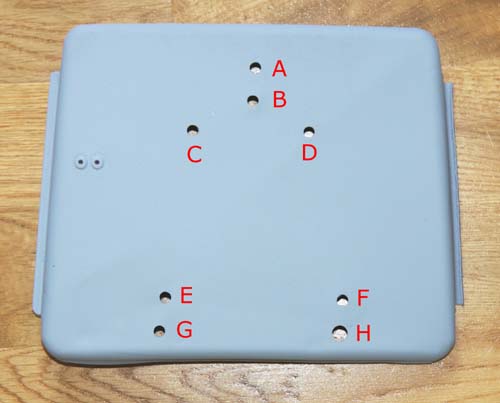
Of all these holes, only C and D are needed, for the Velocette badge and the engine/frame number plate. The rest will need to be got rid of.
RE-PAINTING
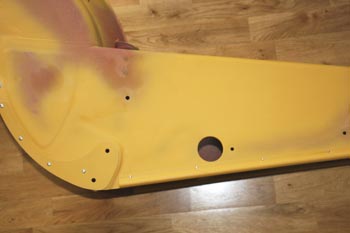
Finally started to spray the colour coats onto the body and frame parts. As with the primer, the paint is diluted 1:1 with thinners, but the resulting mixed paint is thinner in consistency and greater care is needed to avoid runs. This means quite a delicate balance since you do need a thick coat of paint to achieve a good finish, but too thick and it will run. I found that you need to move the spray gun quite slowly and to overlap the passes by about 50%. The first coat looked pretty dull, but now I have applied 2 coats and it looks much better:
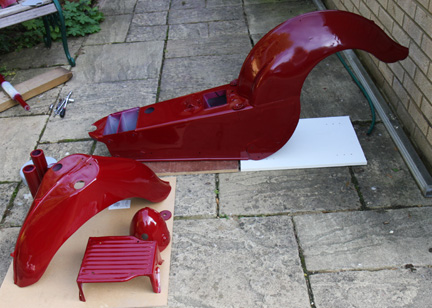
For some reason, the camera seems to have trouble with this colour. Needless to say, all the parts shown above are the same colour but it is the darker body section which is closest to how it appears to the naked eye. I'm pleased with the colour, it is pretty well as I wanted.
It is quite difficult to spray inside any closed space, such as the toolbox, so I intend to brush paint those areas in black Hammerite later.
I intend to do a little rubbing down now, then apply 2 more coats without rubbing down.
Well, since writing the above, I've had a small disaster! I applied 2 more coats of paint and everything looked pretty good. Until the front mudguard fell over while it was still tacky! After a lot of thought I decided to rub down the affected areas and apply some more paint. This meant buying another tin and needless to say, it came out a significantly different colour, so everything has now had 2 more coats and everything is a darker colour.
Now for disaster number 2, a smaller problem! I now discovered I had missed a few items from the painting. There were the headlamp cowl and the two small top pieces for the legshields. I do have a little paint left, so now I've prepared and primed these parts ready for painting.
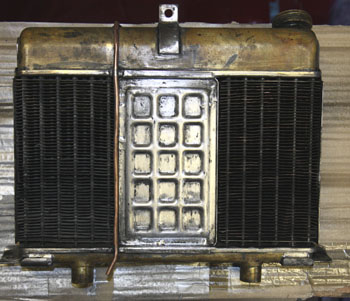
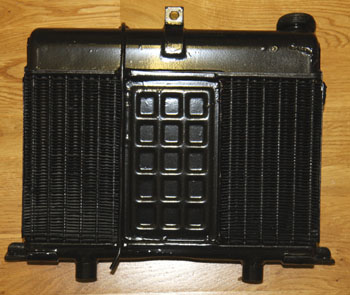
I also realised that I'dnot yet faced the task of painting the radiator and its frame. Just to add to the fun, one of the radiator fixing bolts was well and truly seized and eventually sheared while trying to free it. This was after days of soaking in WD40 - I could have sheared it on day 1 and saved a lot of time and effort. And WD40! I spent some hours cleaning the radiator and then straightening the fins - what a tedious job! Eventually I gave it all several coats of black Hammerite.
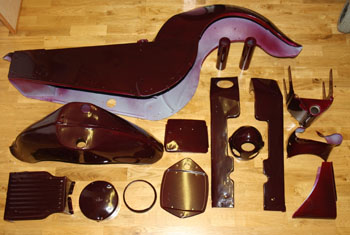
In fact I'm quite pleased with the paintwork - in fact very pleased considering what it was like originally. What a lot of work though!
Body parts painted for the second time |
Radiator ready for painting |
|---|---|
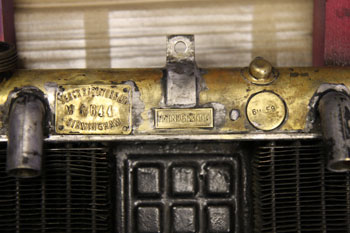
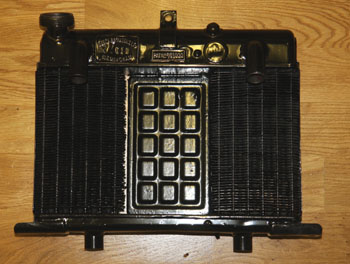
Radiator markings |
Front of radiator painted |
Rear of radiator painted |
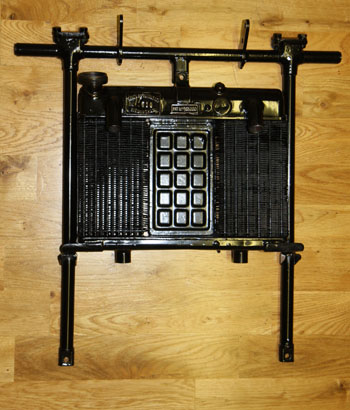
Radiator and frame |
A Little note on Brakes
The brake drums on the LE are very small, but it is possible to make them work quite effectively. Both brakes are similar, single leading shoe items.
As the linings wear, adjustment is maintained by placing shims under the "slippers" on the end of the brake shoes. Up to about 1/8th inch of shim can be accommodated. Note that the leading shoe cops for more wear than the trailing one, resulting in a loss of braking effect as the trailing shoe starts to take more pressure than the leading one. This can be compensated for by placing a thicker shim under the slipper of the leading shoe - a difference of 0.015" makes quite a lot of difference.
Updated: 23rd July 2011